
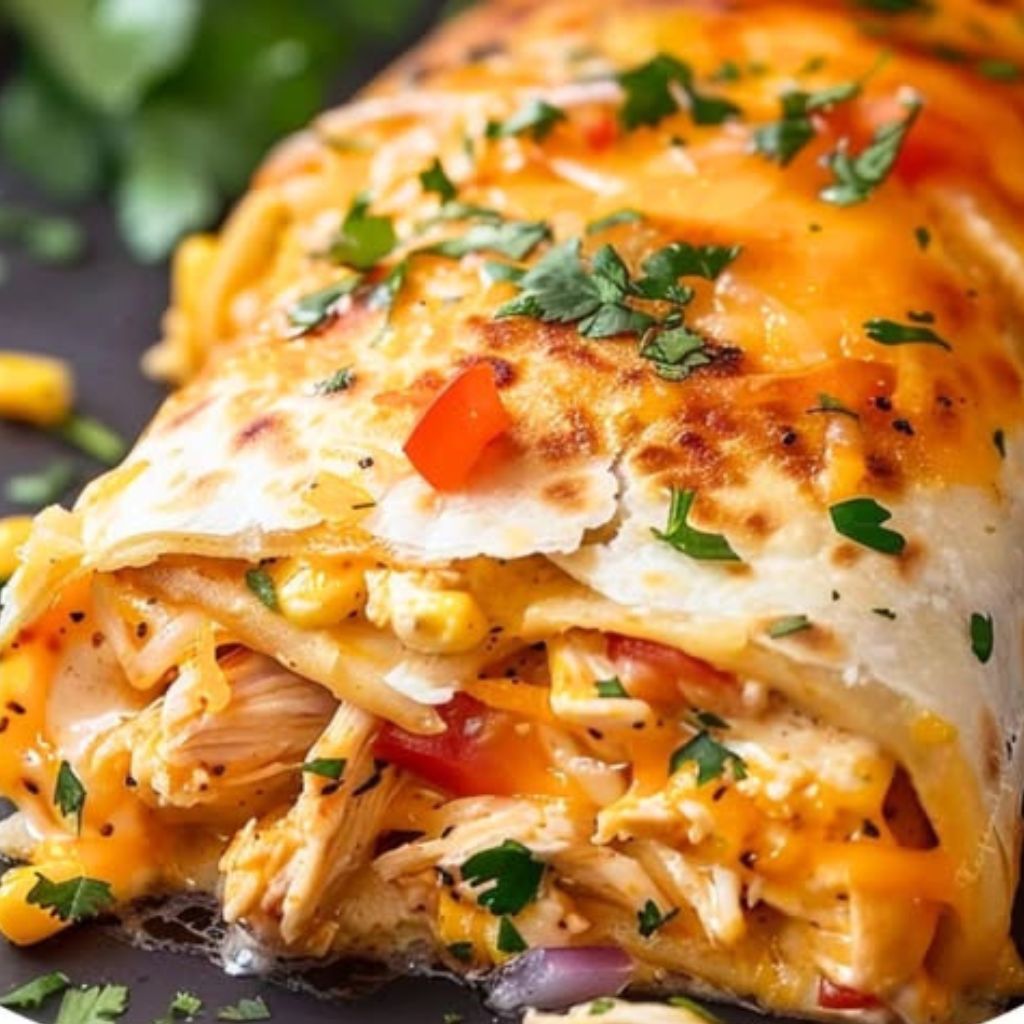
If you grew up loving Chi-Chi’s, then you’ll remember their legendary chimichangas—crispy, golden, cheesy, and stuffed to the brim. This oven-baked version delivers all that nostalgic flavor with a healthier twist.
These Chi-Chi’s Baked Chicken Chimichangas are crunchy on the outside, melty on the inside, and filled with tender chicken, melted cheddar, and Tex-Mex flavor in every bite.
Perfect for summer nights when you want something satisfying but not too greasy, these chimis bake up beautifully in the oven without any deep-frying mess.
🥄 Why You’ll Love This Recipe
-
Crispy without frying: Baked, not fried—for a lighter take on a classic.
-
Cheesy and packed with flavor: A comfort food classic.
-
Quick and easy: 10-minute prep and 20-minute bake.
-
Family favorite: Kid-approved and crowd-pleasing.
-
Perfect for summer dinners or parties: Fun, festive, and freezable.
📝 Ingredients (6 Servings)
-
2 cups cooked chicken breast, shredded (about 300g)
-
1 cup shredded cheddar cheese (120g)
-
½ cup salsa (mild or spicy)
-
½ tsp cumin
-
½ tsp garlic powder
-
¼ tsp onion powder
-
6 large flour tortillas
-
Olive oil spray or melted butter (for brushing)
-
Optional toppings: sour cream, guacamole, chopped cilantro, jalapeños
⏱ Prep & Bake Time
-
Prep Time: 10 minutes
-
Bake Time: 20 minutes
-
Total Time: 30 minutes
-
Yield: 6 chimichangas
👩🍳 Instructions
Step 1: Preheat the Oven
Preheat your oven to 400°F (200°C). Line a baking sheet with parchment paper.
Step 2: Mix the Filling
In a bowl, combine shredded chicken, cheddar cheese, salsa, cumin, garlic powder, and onion powder. Mix until well blended.
Step 3: Assemble the Chimichangas
Lay a tortilla flat. Spoon about ⅓ cup of filling into the center. Fold in the sides and roll up tightly like a burrito. Place seam-side down on the baking sheet. Repeat for all tortillas.
Step 4: Brush and Bake
Lightly brush the tops with olive oil or melted butter for that golden crisp. Bake for 20 minutes, flipping once halfway through, until crispy and golden brown.
Step 5: Serve
Top with your favorite garnishes—sour cream, avocado, pico de gallo, or more salsa—and serve immediately.
🌞 Why They’re Perfect for Summer
-
No hot oil required: Keep your kitchen cool with oven baking.
-
Picnic-ready: Serve with chips and salsa for a full Tex-Mex feast.
-
Great for gatherings: Easy to make in large batches.
-
Pairs with fresh sides: Serve with corn salad, black beans, or guacamole.
💡 Tips & Variations
-
Swap the protein: Use ground beef, pulled pork, or black beans for variety.
-
Add rice or corn: Bulk them up with leftover cooked rice or sweet corn.
-
Make them spicy: Add diced jalapeños, chipotle in adobo, or spicy salsa.
-
Add a sauce: Serve smothered in enchilada sauce or queso blanco.
-
Make it freezer-friendly: Assemble and freeze before baking. Bake from frozen, adding 5–10 minutes.
🧊 Storage & Reheating
-
Fridge: Store in an airtight container for up to 4 days.
-
Freezer: Wrap tightly in foil or plastic and freeze for up to 2 months.
-
Reheat: Bake in a 350°F oven or air fryer for 10–15 minutes until hot and crispy.
Great for make-ahead lunches or easy weeknight dinners.
🌯 What’s a Chimichanga, Anyway?
A chimichanga is essentially a deep-fried burrito—typically filled with meat, cheese, and salsa. Originating from Tex-Mex cuisine, it’s crispy on the outside and savory inside.
This baked version keeps the spirit alive while making it more accessible (and healthier) for everyday meals.